Friday, September 26, 2014
Alfatel H1 Sim Way
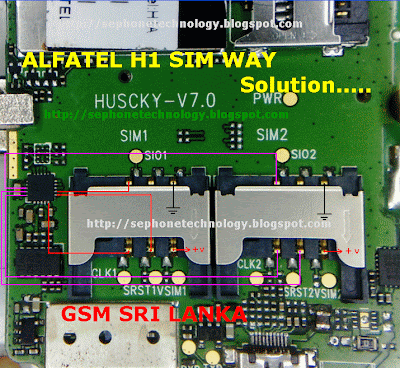
Alfatel H1 Sim Way Solution,
if you check it much give few comments about this so that others can learn form your comments also.
If you have any other Questions please do not hesitate to share with me.
Motorola Xyboard 8 2 with WIFI Factory data reset
| Motorola Xyboard 8.2 with WIFI Factory data reset |
Performing soft reset and factory data reset ( master reset or hard reset ) Motorola Xyboard 8.2 with WIFI via Settings menu and Hardware key :
Hard reset via Settings
- From the home Lcd, touch Apps
- Touch Settings
- Touch Privacy
- Touch Factory data reset
- Touch Reset tablet and follow the onLcd instructions
Hard reset via hardware / external keys
The steps below should only be used if you are unable to navigate through the menu to perform a standard factory data reset:
- Turn tablet off. You may need to use two hands in this process to press and hold buttons properly.
- Turn on the tablet with power button, wait a full 2 seconds from the time the tablet starts showing the red Motorola logo, then press and hold the down and up Volume key. (you should not hold down the power button after it turns on and logo appears)
- “Android Recovery” will appear on top of Lcd if timing is done correctly. Release volume button. (if you continue to press volume down at that message, the message will cycle through “RSD, Fastboot, and back to Android Recovery. Make sure message states Android Recovery before you go to next step). If stuck at a RSD protocol or Fast boot Lcd, reboot the tablet by holding power button then pressing the volume up).
- While Lcd states “Android Recovery“, Press volume up button, the Lcd will say “Entering Android recovery mode” and a few seconds later an Android robot graphic will appear alone on the Lcd. Release buttons.
- Hold down power button and then press the volume up key together to see the Android Recovery Lcd menu selections.
- Use the volume buttons to move up and down through selection in this menu.
- Using the volume down button, scroll down to “Wipe data/factory reset”
- Tap Power hard key to select option.
- Scroll down to select “Yes, delete all user data”.
- Tap the power button to select. Wiping and formatting data will take a few minutes.
- You will return back to the Android recovery Lcd menu.
Warning! All data will be erased from device memory, including system and application data, settings and downloaded applications. Back up your important data. The device will restore to factory settings.
Performing soft reset
If your device becomes unresponsive, frozen, hangs or freezes , try a forced reboot: Press and hold both Power/Lock button and the up-volume key for 10 seconds. Note: Data on your tablet will not be deleted.
Thursday, September 25, 2014
Free Samsung Tool 4 0 6beta1
Samsung D990, Samsung D910, Samsung D908, Samsung D908 code, Samsung D906, Samsung D900, Samsung D900 code, Samsung D870, Samsung D848, Samsung D840,
Samsung D838, Samsung D830, Samsung D820, Samsung D808, Samsung D807, Samsung D800, Samsung D730, Samsung D720, Samsung D710, Samsung D600E,
Samsung D600Ecode, Samsung D600, Samsung D600 code, Samsung D550, Samsung D528, Samsung D520, Samsung D508, Samsung D500E, Samsung D500, Samsung D488,
Samsung D428, Samsung D418, Samsung D415, Samsung D410, Samsung D407, Samsung D400, Samsung D357, Samsung D347, Samsung D307, Samsung D108,
Samsung D100, Samsung E908, Samsung E906, Samsung E900, Samsung E890, Samsung E888, Samsung E880, Samsung E878, Samsung E870, Samsung E860V, Samsung E860,
Samsung E850, Samsung E848, Samsung E840, Samsung E828, Samsung E820, Samsung E810, Samsung E808, Samsung E800N, Samsung E800, Samsung E788, Samsung E786,
Samsung E780, Samsung E770, Samsung E760, Samsung E758, Samsung E750, Samsung E738, Samsung E730, Samsung E728, Samsung E720, Samsung E715, Samsung E710,
Samsung E708, Samsung E700, Samsung E650, Samsung E648, Samsung E640, Samsung E638, Samsung E635, Samsung E630, Samsung E620, Samsung E610, Samsung E608,
Samsung E600F, Samsung E600, Samsung E578, Samsung E570, Samsung E568, Samsung E560, Samsung E530, Samsung E498, Samsung E490, Samsung E470, Samsung E400,
Samsung E390, Samsung E380, Samsung E370, Samsung E368, Samsung E360, Samsung E356, Samsung E350E, Samsung E350Ecode, Samsung E350, Samsung E350 code,
Samsung E338, Samsung E335, Samsung E330N, Samsung E330, Samsung E320, Samsung E318, Samsung E317, Samsung E316, Samsung E315, Samsung E310, Samsung E308,
Samsung E305, Samsung E300F, Samsung E300, Samsung E250 New, Samsung E250V, Samsung E250, Samsung E236, Samsung E217, Samsung E210, Samsung E116,
Samsung E108, Samsung E105, Samsung E100, Samsung C520, Samsung C516, Samsung C510, Samsung C506, Samsung C450, Samsung C400, Samsung C308, Samsung C300,
Samsung C268, Samsung C266, Samsung C260, Samsung C250, Samsung C240, Samsung C238, Samsung C230, Samsung C225, Samsung C218, Samsung C216, Samsung C210,
Samsung C208, Samsung C207, Samsung C200N, Samsung C200, Samsung C180, Samsung C170, Samsung C140, Samsung C130, Samsung C128, Samsung C120, Samsung X900,
Samsung X840, Samsung X830, Samsung X828, Samsung X820, Samsung X818, Samsung X810, Samsung X808, Samsung X800, Samsung X770, Samsung X700, Samsung X688,
Samsung X680V, Samsung X680N, Samsung X680, Samsung X680 Old, Samsung X668, Samsung X660, Samsung X658, Samsung X656, Samsung X650, Samsung X648,
Samsung X640, Samsung X638, Samsung X636, Samsung X630, Samsung X628, Samsung X620, Samsung X610, Samsung X608, Samsung X600, Samsung X530, Samsung X520,
Samsung X518, Samsung X510, Samsung X508, Samsung X500, Samsung X497, Samsung X496, Samsung X495, Samsung X490, Samsung X486, Samsung X481, Samsung X480,
Samsung X478, Samsung X475, Samsung X468, Samsung X466, Samsung X461, Samsung X460, Samsung X458, Samsung X450, Samsung X438, Samsung X430, Samsung X427M,
Samsung X427, Samsung X426M, Samsung X426, Samsung X400, Samsung X308, Samsung X300, Samsung X218, Samsung X210, Samsung X208, Samsung X200, Samsung X168,
Samsung X166, Samsung X160B, Samsung X160, Samsung X156, Samsung X150, Samsung X140, Samsung X138, Samsung X130, Samsung X120, Samsung X108, Samsung X105,
Samsung X100, Samsung V208, Samsung V205, Samsung V200, Samsung V100, Samsung S730i, Samsung S720i, Samsung S508, Samsung S500, Samsung S500i, Samsung S401i,
Samsung S400i, Samsung S342i, Samsung S341i, Samsung S308, Samsung S300, Samsung S208, Samsung S200, Samsung S100, Samsung M600, Samsung M300, Samsung Q605,
Samsung Q400, Samsung Q300, Samsung Q200, Samsung Q100, Samsung P908, Samsung P900, Samsung P850, Samsung P777, Samsung P738, Samsung P735, Samsung P730,
Samsung P728, Samsung P720, Samsung P710, Samsung P705, Samsung P408, Samsung P400, Samsung P318, Samsung P310, Samsung P308, Samsung P300, Samsung P207,
Samsung P110, Samsung P100, Samsung T719, Samsung T649, Samsung T629, Samsung T619, Samsung T609, Samsung T539, Samsung T519, Samsung T419, Samsung Q605,
Samsung U608, Samsung U600, Samsung U308, Samsung U300, Samsung U108, Samsung U106, Samsung U100, Samsung J600, Samsung F520, Samsung F308, Samsung F300,
Samsung F210, Samsung F200, Samsung I730, Samsung I700, Samsung I505, Samsung I500, Samsung I320, Samsung I310, Samsung I308, Samsung I300X, Samsung I300,
Samsung Z105U, Samsung Z105T, Samsung Z105, Samsung Z107V, Samsung Z107M, Samsung Z107, Samsung Z110, Samsung Z130X, Samsung Z130, Samsung Z140,
Samsung Z140V, Samsung Z160, Samsung Z300M, Samsung Z300, Samsung Z400, Samsung Z500, Samsung Z500V, Samsung Z540, Samsung Z560, Samsung Z700,
Samsung ZM60, Samsung ZV10, Samsung ZV30, Samsung ZV40, Samsung ZV50, Samsung ZX10.
http://rapidshare.com/files/170183796/F.S.T.4.06b_fixedgsm.blogspot.com.rar
Samsung D838, Samsung D830, Samsung D820, Samsung D808, Samsung D807, Samsung D800, Samsung D730, Samsung D720, Samsung D710, Samsung D600E,
Samsung D600Ecode, Samsung D600, Samsung D600 code, Samsung D550, Samsung D528, Samsung D520, Samsung D508, Samsung D500E, Samsung D500, Samsung D488,
Samsung D428, Samsung D418, Samsung D415, Samsung D410, Samsung D407, Samsung D400, Samsung D357, Samsung D347, Samsung D307, Samsung D108,
Samsung D100, Samsung E908, Samsung E906, Samsung E900, Samsung E890, Samsung E888, Samsung E880, Samsung E878, Samsung E870, Samsung E860V, Samsung E860,
Samsung E850, Samsung E848, Samsung E840, Samsung E828, Samsung E820, Samsung E810, Samsung E808, Samsung E800N, Samsung E800, Samsung E788, Samsung E786,
Samsung E780, Samsung E770, Samsung E760, Samsung E758, Samsung E750, Samsung E738, Samsung E730, Samsung E728, Samsung E720, Samsung E715, Samsung E710,
Samsung E708, Samsung E700, Samsung E650, Samsung E648, Samsung E640, Samsung E638, Samsung E635, Samsung E630, Samsung E620, Samsung E610, Samsung E608,
Samsung E600F, Samsung E600, Samsung E578, Samsung E570, Samsung E568, Samsung E560, Samsung E530, Samsung E498, Samsung E490, Samsung E470, Samsung E400,
Samsung E390, Samsung E380, Samsung E370, Samsung E368, Samsung E360, Samsung E356, Samsung E350E, Samsung E350Ecode, Samsung E350, Samsung E350 code,
Samsung E338, Samsung E335, Samsung E330N, Samsung E330, Samsung E320, Samsung E318, Samsung E317, Samsung E316, Samsung E315, Samsung E310, Samsung E308,
Samsung E305, Samsung E300F, Samsung E300, Samsung E250 New, Samsung E250V, Samsung E250, Samsung E236, Samsung E217, Samsung E210, Samsung E116,
Samsung E108, Samsung E105, Samsung E100, Samsung C520, Samsung C516, Samsung C510, Samsung C506, Samsung C450, Samsung C400, Samsung C308, Samsung C300,
Samsung C268, Samsung C266, Samsung C260, Samsung C250, Samsung C240, Samsung C238, Samsung C230, Samsung C225, Samsung C218, Samsung C216, Samsung C210,
Samsung C208, Samsung C207, Samsung C200N, Samsung C200, Samsung C180, Samsung C170, Samsung C140, Samsung C130, Samsung C128, Samsung C120, Samsung X900,
Samsung X840, Samsung X830, Samsung X828, Samsung X820, Samsung X818, Samsung X810, Samsung X808, Samsung X800, Samsung X770, Samsung X700, Samsung X688,
Samsung X680V, Samsung X680N, Samsung X680, Samsung X680 Old, Samsung X668, Samsung X660, Samsung X658, Samsung X656, Samsung X650, Samsung X648,
Samsung X640, Samsung X638, Samsung X636, Samsung X630, Samsung X628, Samsung X620, Samsung X610, Samsung X608, Samsung X600, Samsung X530, Samsung X520,
Samsung X518, Samsung X510, Samsung X508, Samsung X500, Samsung X497, Samsung X496, Samsung X495, Samsung X490, Samsung X486, Samsung X481, Samsung X480,
Samsung X478, Samsung X475, Samsung X468, Samsung X466, Samsung X461, Samsung X460, Samsung X458, Samsung X450, Samsung X438, Samsung X430, Samsung X427M,
Samsung X427, Samsung X426M, Samsung X426, Samsung X400, Samsung X308, Samsung X300, Samsung X218, Samsung X210, Samsung X208, Samsung X200, Samsung X168,
Samsung X166, Samsung X160B, Samsung X160, Samsung X156, Samsung X150, Samsung X140, Samsung X138, Samsung X130, Samsung X120, Samsung X108, Samsung X105,
Samsung X100, Samsung V208, Samsung V205, Samsung V200, Samsung V100, Samsung S730i, Samsung S720i, Samsung S508, Samsung S500, Samsung S500i, Samsung S401i,
Samsung S400i, Samsung S342i, Samsung S341i, Samsung S308, Samsung S300, Samsung S208, Samsung S200, Samsung S100, Samsung M600, Samsung M300, Samsung Q605,
Samsung Q400, Samsung Q300, Samsung Q200, Samsung Q100, Samsung P908, Samsung P900, Samsung P850, Samsung P777, Samsung P738, Samsung P735, Samsung P730,
Samsung P728, Samsung P720, Samsung P710, Samsung P705, Samsung P408, Samsung P400, Samsung P318, Samsung P310, Samsung P308, Samsung P300, Samsung P207,
Samsung P110, Samsung P100, Samsung T719, Samsung T649, Samsung T629, Samsung T619, Samsung T609, Samsung T539, Samsung T519, Samsung T419, Samsung Q605,
Samsung U608, Samsung U600, Samsung U308, Samsung U300, Samsung U108, Samsung U106, Samsung U100, Samsung J600, Samsung F520, Samsung F308, Samsung F300,
Samsung F210, Samsung F200, Samsung I730, Samsung I700, Samsung I505, Samsung I500, Samsung I320, Samsung I310, Samsung I308, Samsung I300X, Samsung I300,
Samsung Z105U, Samsung Z105T, Samsung Z105, Samsung Z107V, Samsung Z107M, Samsung Z107, Samsung Z110, Samsung Z130X, Samsung Z130, Samsung Z140,
Samsung Z140V, Samsung Z160, Samsung Z300M, Samsung Z300, Samsung Z400, Samsung Z500, Samsung Z500V, Samsung Z540, Samsung Z560, Samsung Z700,
Samsung ZM60, Samsung ZV10, Samsung ZV30, Samsung ZV40, Samsung ZV50, Samsung ZX10.
Download
http://rapidshare.com/files/170183796/F.S.T.4.06b_fixedgsm.blogspot.com.rar
How to Transfer Contacts from Sim Card or Memory Card to Sony Xperia Z2
How to transfer contacts from a SIM card to your device:
1. On your devices homeLcd, tap on the .
.
2. Then tap on the Person icon or Contacts.
3. Press the Three Vertical Dots, and select Import contacts > SIM card.
4. If you have set up a synchronization account, then you can choose to add the SIM card contacts under that account. Or you may choose to only use the contacts on your device.
5. If you want to import all the contacts, tap Import all.
6. If you want to select which contact to transfer, you just need to find and tap on the contact.
How to transfer contacts from a memory card to your device:
1. On your devices homeLcd, tap on the .
.
2. Then tap on the Person icon or Contacts.
3. Press the Three Vertical Dots, and select Import contacts > SD card.
4. Choose the option you preferred if you have set up a synchronization account. Whether to add the imported contacts under that account or on your device.
5. If you have more than one vCard file on the SD card, there should be a list appear on the different batches of contacts. Just select the batch you want to import.
1. On your devices homeLcd, tap on the
2. Then tap on the Person icon or Contacts.
3. Press the Three Vertical Dots, and select Import contacts > SIM card.
4. If you have set up a synchronization account, then you can choose to add the SIM card contacts under that account. Or you may choose to only use the contacts on your device.
5. If you want to import all the contacts, tap Import all.
6. If you want to select which contact to transfer, you just need to find and tap on the contact.
How to transfer contacts from a memory card to your device:
1. On your devices homeLcd, tap on the
2. Then tap on the Person icon or Contacts.
3. Press the Three Vertical Dots, and select Import contacts > SD card.
4. Choose the option you preferred if you have set up a synchronization account. Whether to add the imported contacts under that account or on your device.
5. If you have more than one vCard file on the SD card, there should be a list appear on the different batches of contacts. Just select the batch you want to import.
Wednesday, September 24, 2014
Samsung I9100 GalaxyS2 Usb Not Detected Solution
Samsung I9100 GalaxyS2 Usb Not Detected Solution ,Samsung I9100 GalaxyS2 Usb Not Detected Cellular Solution Network,Samsung I9100 GalaxyS2 Usb No Response Cellular Solution Network,Samsung I9100 GalaxyS2 Usb Not Detec Ways Cellular Solution Network,If You Filling Touch Problem Of Your cellular Phone No Tension Just Visit Our Previous Post & Filling Enjoy ,Samsung I9100 GalaxyS2 Usb Not Detected Solution Network ,Samsung I9100 GalaxyS2 Usb Not Supported Cellular Phone Solution,Samsung I9100 GalaxyS2 Usb Ways Repair Solution,Samsung I9100 GalaxyS2 Usb Not Connected ,Detected Jumper Trikcs Solution,Samsung I9100 GalaxyS2 Usb Not Detected Ways GuideSolution, Mustbe Work Red Marked Ic & Work It Your Own Risk-Plzz Share This Post If You tested ,Tnxx To Visit Again Our Blogger.
N Gage Solution pack
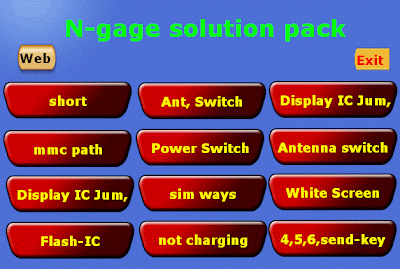 N-Gage Solution packDownload,
if you check it much give few comments about this so that others can learn form your comments also.
If you have any other Questions please do not hesitate to share with me.
If you have any other Questions please do not hesitate to share with me.
Samsung Trender Factory Data Reset Procedures
Samsung Trender Factory Data Reset Procedures - Samsung Trender is considered as an eco-friendly device since its part made of recycled materials. As a side-slider phone, the Trender contains a slide out qwerty keyboard along side the two.8” TFT resistive touchLcd that show 240 x 320 pixels resolution. It works beneath CDMA Technology. The options embody 1.3MP camera with digital zoom; Bluetooth; microUSB; rib text and film messaging; accelerometer device for UI auto-rotate; music player; a three.5mm headphone connector; and supports up to 32GB microSD memory cards.
You can additionally notice the fundamental options such as: Calendar, Alarm, Calculator, Organizer and Voice memo. Indeed, this phone doesn’t supply options the maximum amount because the mechanical man phones. except for people who can’t afford mechanical man smartphone or people who needs a straightforward convenience in its basic perform, then Trender might be an possibility.
Resetting Samsung Trender Phone’ Setting
Resetting the phone settings only restores all of the factory defaults, including the ringer types and display settings. Onboard data such as Contacts, History, Scheduler, and Messaging are not affected.
- Press Home and touch Main > Settings > Reset > Reset Settings. (A disclaimer is displayed.)
- Read the disclaimer, write down the code displayed in the Lcd message, and touch Proceed. Note: If Parental Control has been enabled, user’s lock code will also need to be entered before continuing.
- Enter the lock code provided on the disclaimer by using the onLcd keypad.
- Touch Done to reset the phone’s settings.
Samsung Trender Factory Data Reset Procedures
- Press Home and touch Main > Settings > Reset > Reset Phone. (A disclaimer is displayed.)
- Read the disclaimer, write down the lock code, and touch Proceed.
- Enter the lock code provided on the disclaimer by using the onLcd keypad.
- Touch Done to restore your phone to its factory default state.
Good Luck…
Nokia Asha 501 RM 900 Latest Version 10 0 21 Flash File Free Download
4:30 AM
0, 10, 21, 501, 900, asha, download, file, flash, free, latest, nokia, rm, version
No comments
Nokia Mobile Asha 501 RM-900 Latest Version 10.0.21 Flash File Free Download
Phone Name : Nokia Mobile Asha 501
Product Type : RM-900
Firmware Version : 10.0.21
Variant Id : N/A
Varian Name : RM-900 VAR LATAM-A1 MX TELCEL SL BLACK
Product Code : 059S9M6
File Name : S40NG_Telcel_MX_sim_lock_V3_simlock_crc33A9.bin Product Type : RM-900
Firmware Version : 10.0.21
Variant Id : N/A
Varian Name : RM-900 VAR LATAM-A1 MX TELCEL SL BLACK
Product Code : 059S9M6
File Size : 76 bytes
File Name : RM900_059S9M6_hwt_v031.bin
File Size : 212 bytes
File Name : rm900_10.0.21_059R362_a1_SD_4GB_207_03_287372.cardverref.xml
File Size : 284 bytes
File Name : RM900_059S9M6_ccc_v031.bin
File Size : 488 bytes
File Name : RM900_059S9M6_10.0.21_031.spr
File Size : 733 bytes
File Name : DC_WP8_Template_S40_v4.bin
File Size : 1,05 Kb
File Name : RM900_059S9M6_10.0.21_031_signature.bin
File Size : 1,54 Kb
File Name : RM900_059S9M6_10.0.21_031.vpl
File Size : 4,71 Kb
File Name : 040113531v1.0_label_layout.xml
File Size : 5,03 Kb
File Name : 040113531v1.0dpi600.pcx
File Size : 7,85 Kb
File Name : RM900_059S9M6_10.0.21_031.dcp
File Size : 160,16 Kb
File Name : rm900_10.0.3_059R362_a1_207_03_287372.rofs.fpsx
File Size : 4,25 Mb
File Name : rm900_10.0.21_059R362_a1_SD_4GB_207_03_287372.fpsimage.fpsx
File Size : 8,06 Mb
File Name : rm900_10.0.3_059R362_a1_207_03_287372.image.fpsx
File Size : 27,63 Mb
File Name : rm899_10.0.21.mcusw.fpsx
File Size : 28,18 Mb
Tuesday, September 23, 2014
JAP Flasher Cable Pin Out
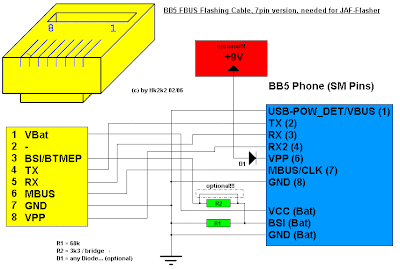
JAP Flasher Cable Pin Out......
if you check it much give few comments about this so that others can learn form your comments also.
If you have any other Questions please do not hesitate to share with me.
If you have any other Questions please do not hesitate to share with me.
nokia 1280 mic jumper solution
nokia 1280 mic jumper nokia 1280 mic solution nokia 1280 tricks 1280 nokia mic jumper M 1280 nokia 1280 micro problem solutions Nokia 1280 mouth piece jumper Nokia 1280 mouthpiece problem nokia 1280 mouth piece solution jumper jalur mic nokia 1280 solution for mouth piece of nokia 1280,

make these jumpers if any of them is broken and also check mic volt some time all links are ok but mic volt are not same as the should be in that case change nokia 1280 mic.

make these jumpers if any of them is broken and also check mic volt some time all links are ok but mic volt are not same as the should be in that case change nokia 1280 mic.
Monday, September 22, 2014
2700c Memory Card how to fix problem


the following article. Also you will find Nokia 2700c Memory Card Ways
and Jumpers information in the diagrams further in this post.
In Nokia 2700c Memory Card Problem can occur because of the faulty MMC
IC or it's bad connection to the Cell Phone's Motherboard. So first of
all you should clean Nokia 2700c Memory Card Ways MMC IC and
Motherboard of the Mobile Phone. If that does not work then you can
replace the MMC IC.
Please Note that we will edit these solutions or add new ones if found
in this page at any time in the future. So feel free to come back any
time on this page to stay up to date.
If you have further Questions please don't hesitate to leave a comment.
Note: Every repairing solution posted here is tested by at least one
member of our team. Use the information available here at Your Own
Risk. We are not responsible if any harm comes to your device during
the repairing process.
How To Update Asus Transformer TF101 to Android 4 1 2 Jelly Bean via CM10
5:00 PM
1, 2, 4, android, asus, bean, cm10, how, jelly, tf101, to, transformer, update, via
No comments
Now you can download and install Android 4.1.2 Jelly Bean based CM10 custom firmware on your Asus Transformer TF101. CynogenMod team began holding nightly version of CM10 that allows Android 4.1.2 Jelly Bean on your Asus Transformer TF101. The good thing about version every night, it updated every day, then there remains the problem that much faster. Jelly Bean Android 4.1.2 comes with various latest features over previous releases Jelly Bean, then you may always happy to try it. CM10 build also comes with so many adjustments that you will not see in the stock firmware and can not be avoided. We conclude from the detailed installation tutorial Jelly Bean Android 4.1.2 CM10 custom ROM based on the Asus Transformer TF101 below.
 |
| By Google |
Warning!
This tutorial is only for Asus Transformer TF101. Don’t try this guide on any other Android device. Also, we are not responsible for any damage caused due to the instruction given in this page. Try this at your own risk. However, it is very unlikely that your device will be damaged if you follow all the instructions as it is which are mentioned in procedure
Pre Requisites:
1. Backup your device data. You can follow our ultimate backup guide.
2. Make sure your device have at least 60% battery power. You can install an app like Battery Notifier BT Free on your Android device to check it easily.
3. You already have USB Driver Installed for Asus Transformer TF101 in your PC. [Download USB Drivers]
4. Make sure USB Debugging is enabled otherwise you won’t able to transfer file between PC and Asus Transformer TF101. [Guide].
5. Your device have ClockworkMod Recovery Installed. [Guide]
6. Your device is rooted already.
If you done everything that we mentioned above then you are ready to follow step-by-step guide on how to install Android 4.1.2 Jelly Bean based CM10 ROM on Asus Transformer TF101.
File Required(Download by clicking on it)
- CM10 Android 4.1.2 Jelly Bean ROM For Asus Transformer TF101 [Filename: cm-10-20130929-NIGHTLY-tf101.zip]
- Google Apps [Filename: gapps-jb-20121011-signed.zip]
How to Install Android 4.1.2 Jelly Bean based CM10 ROM on Asus Transformer TF101
- Connect your device to PC using USB cable and then copy downloaded files to the SD card of your device.Important: Don’t extract any files.
- Disconnect USB and then turn off your Asus Transformer TF101.
- Now boot into ClockworkMod recovery. To do so, press and hold Volume Down + Power, until a message appears on-Lcd saying “Press Vol. Up to enter RCK (5s)”. Here, in less than 5 seconds, press the Volume Up button to enter CWM recovery. You can navigate through CWM recovery options using Volume button and use Power button to select items.
- Perform a Nandroid backup of your existing ROM that you can restore later if this new ROM not work or you want to go back into your previous ROM. To perform a backup, select Backup and Restore, then on the next Lcd, select Backup again. Go back to main recovery menu after backup is complete.
- Now, perform data wiping task. To do so, select wipe data/factory reset, then select Yes on next Lcd to confirm your action. Wait few minutes till the data wipe is complete. Now come back to CWM recovery main menu. Select wipe cache partition and after wiping process done, select Wipe Dalvik Cache under advanceoption to perform Dalvik cache wiping.
- Select install zip from sdcard, then select choose zip from sdcard. Now, locate the cm-10-20130929-NIGHTLY-tf101.zip file that you copied earlier in Step 1 and select it by pressing Power button. Confirm installation by selecting Yes – Install _.zip on the next Lcd. The ROM installation will begin.
- Once the ROM installation process end, repeat the step 6 but choose the gapps-jb-20121011-signed.zip file instead of ROM zip to install the Google apps package.
- When installation is completed, go back to the main recovery menu and select reboot system now to reboot your Asus Transformer TF101 and boot up into customized Android 4.1.2 Jelly Bean ROM CM10. The first boot will take time, so be patient!
- Returning to Previous ROM: To go back to your previous ROM, boot into recovery, select backup and restore then restore your previous ROM by selecting it from the list.
Congrats! Android 4.1.2 Jelly Bean firmware based custom ROM CM10 is now installed and running on your Asus Transformer TF101.
All Symphony Mobile Solutions
All Symphony Mobile Hardware Solution download Gsm by sibu
Symphony c105 headphone solution
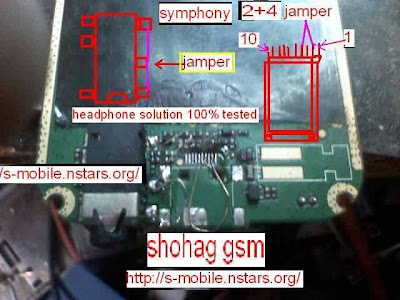
Symphony c101 charging way solution
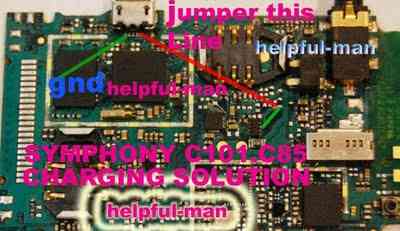
symphony c91 allsolution
symphony c91 Charging Solution
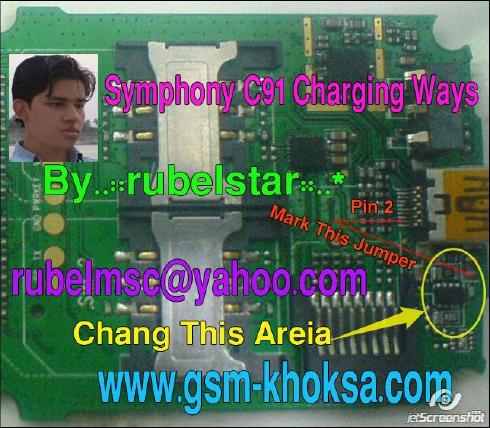
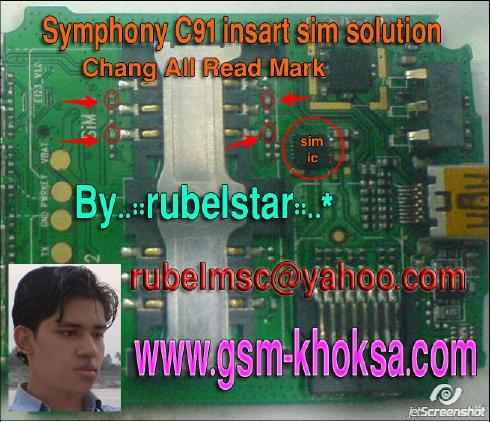
Symphony 91 Insert Sim solution
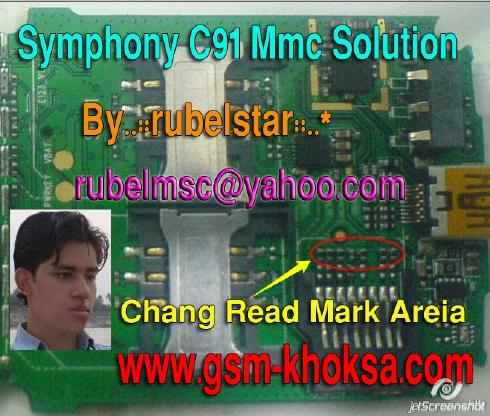
MMC solution
C91 Network solution

C91 restart solution

Symphony C91 Ringer solution

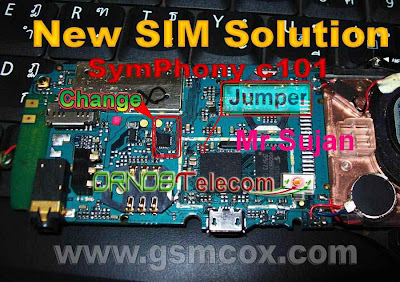
SymPhony c101 New SIM Solution
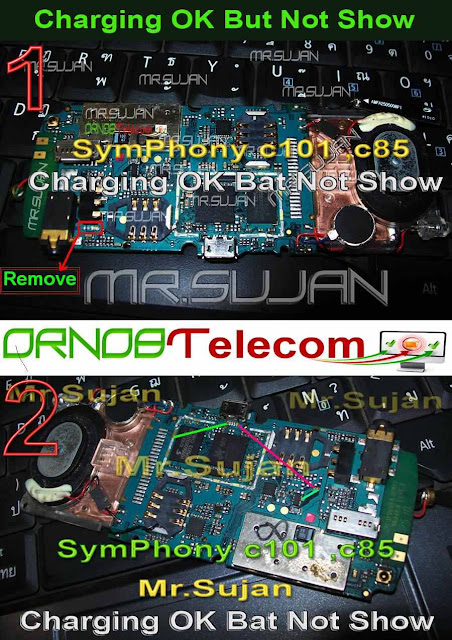
SymPhony Charging OK Bat Not Show Solution
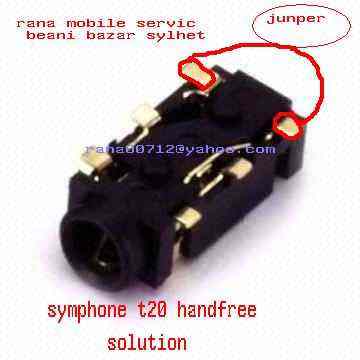
symphone-t20-handfree-solution
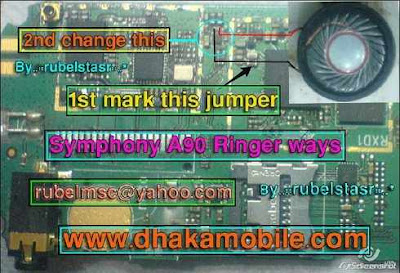
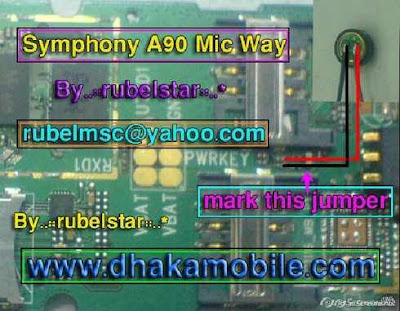
Symphony A90 Mic Ways
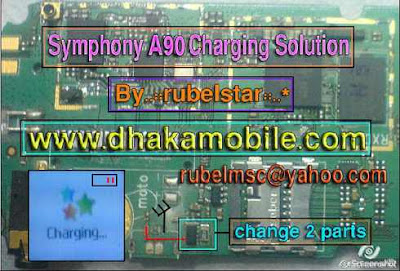
Symphony A90 Charging Solution
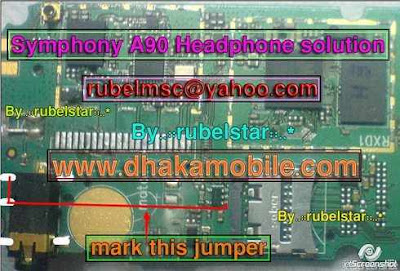
Symphony A90 Headphone Solution
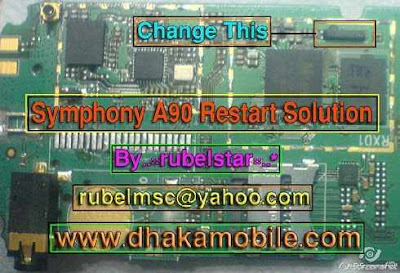
Symphony A90 Restart Solution
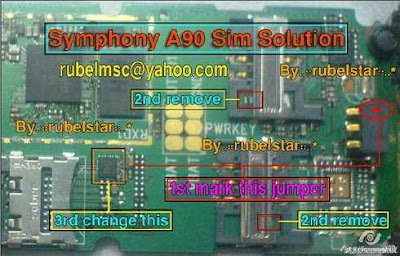
Symphony A90 Insert Sim Solution
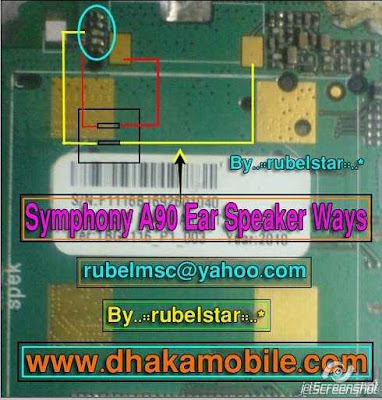
Symphony A90 Ear Speaker Ways
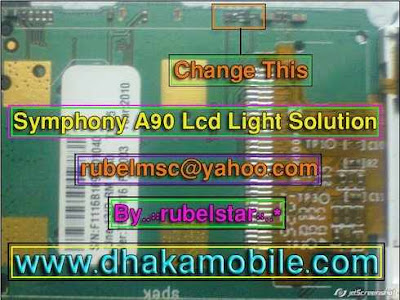
Symphony A90 Lcd Light Solution
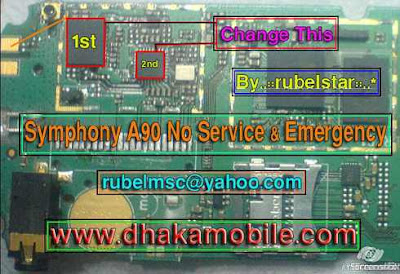
Symphony A90 No Service Emergency Solution
Root Unroot Samsung Galaxy Y
Features
-Add SuperUser 3.1.3+Su-Add SuperSU 0.94+Su
-Add BusyBox binary v1.20.2
-Deleting all traces of Busybox and Busyboxpro
-Add BusyBox binary v1.20.2
-Add SQlite3
-Add SSh-Deleting all traces of Superuser And SuperSU
-Deleting all traces of Suhax -Deleting all traces of Busybox and Busyboxpro
Instructions
- Download the file from Here.
- Place it in the root of your SD card (i.e Direct on SD card not in any files)
- Reboot in CWM recovery (Volume up button+Home button+Power button)
- Choose the "Install zip from SD card" and choose the downloaded file
- Follow the instruction according to installer and do your desired work of ROOTING or UNROOTING using only 1 file.
Sunday, September 21, 2014
Get Install Android 4 4 2 KitKat PAC man ROM on LG Optimus G Pro E980 How To Using Guide
11:45 AM
2, 4, android, e980, G, get, guide, how, install, kitkat, lg, man, on, Optimus, pac, pro, rom, to, using
No comments
LG Optimus G Pro E980 can be updated to latest Android 4.4.2 KitKat. The upgrade is possible with the help of custom ROM PAC-man. The development team of PAC-man ROM finally introduced Android 4.4.2 KitKat based PAC-man ROM for LG Optimus G Pro E980. Which means, you can download and install custom firmware PAC-man to update your LG Optimus G Pro E980 to latest Android 4.4.2 KitKat. LG Optimus G Pro E980 comes with good hardware spec, hence is capable to run PAC-man smoothly. PAC-man ROM consist various features of Paranoid Android, AOKP and CyanogenMod. The link Im sharing is PAC-man nightly build. The good thing about nightly build is, you will receive update daily and bugs are fixed faster as well as new feature introduced regularly. Continue reading this guide to know how to install Android 4.4.2 KitKat based PAC-man custom ROM on LG Optimus G Pro E980.
PAC-man comes with various useful customization. Since, PAC-man is based on Android 4.4.2 KitKat, you may like to know whats new on it. Some of the cool Android 4.4.2 KitKat features that you will enjoy is Screen Recording, Tap to Pay (Google Wallet for everyone), NFC emulation for non nfc devices, 14% less memory usage, cloud printing from Gallery, Google Home is the new Launcher, Core System Processes Trimmed, apps are efficient and responsive on all devices, the all new procstats tool details memory use, Full-Lcd Immersive mode, seamless change in resolution during media playback, Phone dialer got local business detection, redesigned Quickoffice and many more.
Please note, not all Android 4.4.2 KitKat feature yet ported to PAC-man ROM.

Another thing you should note, this is nightly build, hence expect some bugs in it. All bugs and issues expected to be fixed as development progress towards a stable PAC-man build.
Warning!
This tutorial is only for LG Optimus G Pro E980. Don’t try this guide on any other Android device. Also, we (Android Pulp Team) are not responsible for any damage caused due to the instruction given in this page. Try this at your own risk. However, it is very unlikely that your device will be damaged if you follow all the instructions as it is which are mentioned in procedure.
Pre Requisites:
1. ROM flashing require you to wipe your internal memory data, hence you required to backup your device data. You can follow our ultimate backup guide.
2. Make sure your device have at least 60% battery power. If your phone shut down during installation then there is good chance to brick your device.You can install an app like Battery Notifier BT Free on your Android device to check it easily.
3. You must have USB Driver Installed for LG Optimus G Pro E980 in your PC. [Download USB Drivers]
4. Make sure USB Debugging is enabled otherwise its wont be possible to transfer file between PC and LG Optimus G Pro E980. [Guide].
5. Your device have latest CWM version 6.0.4.4 and up or TWRP 2.6.3.1 and up installed. [General Guide]
If you done everything that we mentioned above then you are ready to follow step-by-step guide on how to install Android 4.4.2 KitKat based PAC-man ROM on LG Optimus G Pro E980.
File Required(Download by clicking on it)
- PAC-man For LG Optimus G Pro E980 [Filename: pac_e980-nightly-20140514.zip]
- Google Apps [Filename: pa_gapps-stock-4.4.2-20140207-signed.zip]
How to Install Android 4.4.2 KitKat based PAC-man ROM on LG Optimus G Pro E980
- Connect your device to PC using USB cable and then copy downloaded files to the SD card of your device. Important: Don’t extract any files.
- Disconnect USB and then turn off your LG Optimus G Pro E980.
- Now, boot into recovery mode. To do so, press and hold Volume Up & Power until fastboot Lcd appears, then press Volume Down twice, then press Power to boot recovery [use volume buttons to scroll and Power button to select]. Alternatively try this: Recovery Mode without Key Combination.
- Perform a Nandroid backup of your existing ROM that you can restore later if this new ROM not work or you want to go back into your previous ROM. To perform a backup, select Backup and Restore, then on the next Lcd, select Backup again. Go back to main recovery menu after backup is complete.
- Now, perform data wiping task. To do so, select wipe data/factory reset, then select Yes on next Lcd to confirm your action. Wait few minutes till the data wipe is complete. Now come back to CWM recovery main menu. Select wipe cache partition and after wiping process done, select Wipe Dalvik Cache under advance option to perform Dalvik cache wiping.
- Select install zip from sdcard, then select choose zip from sdcard. Now, locate the PAC-man Zip file that you copied earlier in Step 1 and select it by pressing Power button. Confirm installation by selecting Yes – Install _____.zip on the next Lcd. The ROM installation will begin.
- Once the ROM installation process end, repeat the step 6 but choose the pa_gapps-stock-4.4.2-20140207-signed.zip file instead of ROM zip to install the Google apps package.
- When installation is completed, go back to the main recovery menu and select reboot system now to reboot your LG Optimus G Pro E980 and boot up into Android 4.4.2 KitKat ROM PAC-man.
- Returning to Previous ROM: To go back to your previous ROM, boot into recovery, select backup and restore then restore your previous ROM by selecting it from the list.
Tutorial For TWRP Recovery Users:
- Connect your device to PC using USB cable and then copy downloaded files to the SD card of your device. Important: Don’t extract any files.
- Disconnect USB and then turn off your LG Optimus G Pro E980.
- Now, boot into recovery mode. To do so, press and hold Volume Up & Power until fastboot Lcd appears, then press Volume Down twice, then press Power to boot recovery. Alternatively try this: Recovery Mode without Key Combination.
- Create a Backup using TWRP Backup Option.
- Perform a Factory Reset (this will delete all apps and their settings and game progress). To do this, Tap on Wipe, then at the bottom of the Lcd do a Swipe on the ‘Swipe to factory reset‘ option.
- Now its time to add zip file for flashing. Tap on Install, then browse to the location where you saved the files and tap on the PAC-man Zip file. Then tap on Add More Zips, and add pa_gapps-stock-4.4.2-20140207-signed.zip. Now at the bottom of the Lcd, do a swipe on the Swipe to confirm flash option to begin flashing.
- When installation is completed, go back to the main recovery menu and tap on Reboot and then, tap on System to reboot your LG Optimus G Pro E980 and boot up into Android 4.4.2 KitKat ROM PAC-man.
- Returning to Previous ROM: To go back to your previous ROM, boot into recovery, select Backup then through Restore option, restore your previous ROM by selecting it from the list.
Congrats! Android 4.4.2 KitKat firmware based custom ROM PAC-man is now running on your LG Optimus G Pro E980. Now explore the latest Android 4.4.2 KitKat. [Note: If you find difficulties to run root only apps then it may be disabled. Do this then, enable developer settings first (tap the build number 8 times under about device), then enable root under Developer Settings].
Nokia Asha 200 factory reset
Warning! All data will be lost!
Power on your phone
Just type *#7370#
Type security code 12345
Wait until the phone restarts
Saturday, September 20, 2014
Manual Update LG Optimus G with Jellybean 4 2 2 Firmware
LG Optimus G smartphone can now be updated with Jellybean 4.2.2 firmware, though there is no official word on by when there will be an official update from LG, you can still go ahead and apply this firmware in your device. Before checking out on how you can apply with this update, you will need to go through the list of pre requisites which we have mentioned below. This custom ROM firmware comes with all the features of Jellybean 4.2.2 firmware and also the goodies of Jellybean 4.2.2. Considering that LG Optimus G smartphone has got the state of the art features which can smoke off even the Galaxy Smartphones, this custom ROM is no less than a beauty.
This custom ROM firmware is dubbed as AVATAR ROM and comes with the below mentioned features;
- Theme Chooser with Google Play Store theme
- Bazooka Launcher
- Messaging app theme
- Boot Animation theme
- Tons of themes for Font
- Over-the-Air updater
- Supports complex unlock gestures
- Weebo app
- Theme editor
Pre Requisites:
- Create a backup of all the data with the help of below mentioned steps, with the help of below mentioned steps you need to back up all the data. Please don’t backup the data with the help of KIES as it may not recognize the device after applying this update.
SMS – Use “SMS Backup & Restore app”,
Contacts – Sync with the Gmail application,
Call Log - Call Log and Restore
Images, Songs, Videos, Files – Copy to internal / External SD Card,
APN and MMS Settings – Note down from the path “Applications > Settings > Wireless and Network > Mobile Networks > Access Point Names”
- From the path “Settings > Applications > Development > USB debugging”, enable the USB Debugging and also make sure that your device is left with the minimum of 40% or the device will get turned off in the middle of customizing process.
- Download “Root Checker” app from the Google PLAY Store to check on whether the device is rooted or not. Once the device is rooted, you can then proceed to the next step.
Disclaimer: Though we don’t like to give any disclaimers, the only thing we would like to tell you is that please follow all the instructions mentioned in this article or else there is a risk of bricking your device for which we should not be held responsible.
So assuming that you are done with all the above mentioned steps, you can now head over to the next step where we have mentioned the detailed guide on how to apply with this firmware update.
Procedure to Update LG Optimus G with Jellybean 4.2.2 Firmware:
- Download the Avatar ROM Jellybean 4.2.2 firmware package and Google Apps Package from here to your computer. Once downloaded, connect your phone to the computer with the help of original USB cable and place the two zip files in your device.
- Disconnect and Turn Off your LG Optimus G smartphone so that it can be entered in the Recovery Mode. Press Volume down key twice before powering the device into the Recovery Mode. Just in case if your phone boots in the normal mode, you can re try the process of entering the device in the recovery mode.
- In recovery Mode, clear the cache and wipe the data by selecting the appropriate options and then select “Install Zip from SD Card’ and select the Jellybean 4.2.2 Firmware Package then the Google Apps Package which you have placed in your device to apply the update.
- Once both the packages are selected, you will need to select the
- option of “go back” and select the “reboot system now” for rebooting the device in the normal mode. Please note that it might take more than 4 -5 minutes for applying the update.
Note: If the device gets into the boot loop sequence or say gets stuck in the welcome Lcd, just re insert the battery and re follow the above instructions so as to again follow the above mentioned instructions.
So there you go, you have now successfully applied the update of latest Jellybean 4.2.2 firmware. Do let us know in the comments section just in case if you face any issues in the process of firmware update.


